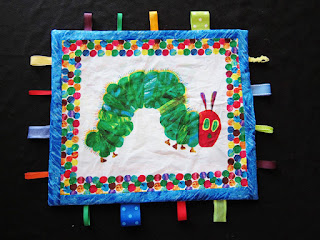
 Oh my goodness, this was SOOOO fun and super easy to make! I've always wanted to make one, and figured I better get on my way before Jaxton got too old for it! (Cause who knows when we'll have another little one! lol.)
This is the back of the blanket, just as cute as the front!!! This panel of fabric came with 3 images. The 2 caterpillar pictures I used and a butterfly! These 2 pix matched up perfectly but the Butterfly image was WAY bigger and didnt match up right so I couldn't use it. =(
 I wish I had known Jaxton's personality while he was in the womb because instead of doing a 101 Dalmatian theme I totally would have gone for the Very Hungry Caterpillar theme! This boy LOVES to eat!
 I didn't take many pictures throughout this project, so I can't really make a tutorial about it, BUT for in depth directions, this website is great!
And here is a cute youtube video of the same idea but using an alphabet letter instead!
The only thing I did differently was to add a Chip Bag in the middle to add the crinkle effect.****
 I knew I wanted to do a Hungry Caterpillar Taggie Blanket for Jaxton, but I couldn't believe how perfect this small panel of fabric was! I was so excited when I found this fabric!!!
I added a 1 inch blue border, so the final size was 16.5x 14 inches. Each ribbon I cut was 4 inches long.
This is how you want the ribbons pinned down. Then I sewed each ribbon over 3 times for security. Then you sew it right sides together, with batting (and a chip bag) just as if you were sewing a blanket. Leave a small opening so you can turn it inside out, then hand stitch the small opening, closed.
****The reason this top part is all crinkly is because in between the batting and the cotton fabric I added a Tortilla Chip Bag! Yup, I wanted a CRINKLE Taggie Blanket! It was totally an experiment and it worked! I obviously won't be able to iron or dry it, but Jaxton loves the crinkle noise! After doing a little more research I found that the idea of using a food bag for DIY Crinkle blankets is pretty common! I just wish they still made those loud Sun Chip bags! haha!


Super cute!!
ReplyDelete